Quickstart guide - GitHub Copilot
Objective
This guide will get you up and running with CodeGate in just a few minutes using Visual Studio Code and GitHub Copilot. By the end, you'll learn how CodeGate helps protect your privacy and improve the security of your applications.
Prerequisites
You must have an active subscription to GitHub Copilot.
CodeGate runs on Windows, macOS (Apple or Intel silicon), or Linux systems.
Required software:
- Docker Desktop (or Docker Engine on Linux)
- VS Code with the GitHub Copilot extension
Start the CodeGate container
Run CodeGate using Docker:
docker run --name codegate -d -p 8989:8989 -p 9090:80 -p 8990:8990 --mount type=volume,src=codegate_volume,dst=/app/codegate_volume --restart unless-stopped ghcr.io/stacklok/codegate:latest
This pulls the latest CodeGate image from the GitHub Container Registry and starts the container the background, with the required port bindings and a volume for persistent data storage.
To verify that CodeGate is running, open the CodeGate dashboard in your web browser: http://localhost:9090
Install the CodeGate CA certificate
To enable CodeGate, you must install its Certificate Authority (CA) into your certificate trust store.
The CA certificate allows CodeGate to securely intercept and modify traffic between GitHub Copilot and your IDE. Decrypted traffic never leaves your local machine.
To install the CodeGate certificate, open the Certificate download page in the web dashboard: http://localhost:9090/certificates
Click the Download Certificate button, review the security information, and follow the OS-specific instructions on the page to import the certificate to your trust store.
Configure VS Code to use CodeGate
In VS Code, open the Command Palette (⌘+Shift+P on macOS or Ctrl+Shift+P on Windows/Linux) and search for the Preferences: Open User Settings (JSON) command. Run it to open your VS Code settings.json file in the editor.
Add the following settings to your configuration:
{
  // ... Existing settings ... //

  // Note: you may need to add a comma after the last line of your existing settings if not present

  "http.proxy": "https://localhost:8990",
  "http.proxyStrictSSL": true,
  "http.proxySupport": "on",
  "http.systemCertificates": true,
  "github.copilot.advanced": {
    "debug.useNodeFetcher": true,
    "debug.useElectronFetcher": true,
    "debug.testOverrideProxyUrl": "https://localhost:8990",
    "debug.overrideProxyUrl": "https://localhost:8990"
  }
}
Restart VS Code after adding the proxy configuration.
Explore CodeGate's key features
To learn more about CodeGate's capabilities, clone the demo repository to a local folder on your system.
git clone https://github.com/stacklok/codegate-demonstration
This repo contains intentionally risky code for demonstration purposes. Do not run this in a production environment or use any of the included code in real projects.
Open the project folder in VS Code. You can do this from the UI or in the terminal:
cd codegate-demonstration
code ./codegate-demonstration
Protect your secrets
Often while developing, you'll need to work with sensitive information like API keys or passwords. You've certainly taken steps to avoid checking these into your source repo, but they are fair game for Copilot to send to its language models as context.
Open the conf.ini or app.json file from the demo repo in the VS Code editor.
In the Copilot chat panel, observe that Copilot has automatically loaded the
active file as context.


Enter this prompt into the chat:
Explain the current file
CodeGate intercepts the request and transparently encrypts the sensitive data before it leaves your machine.
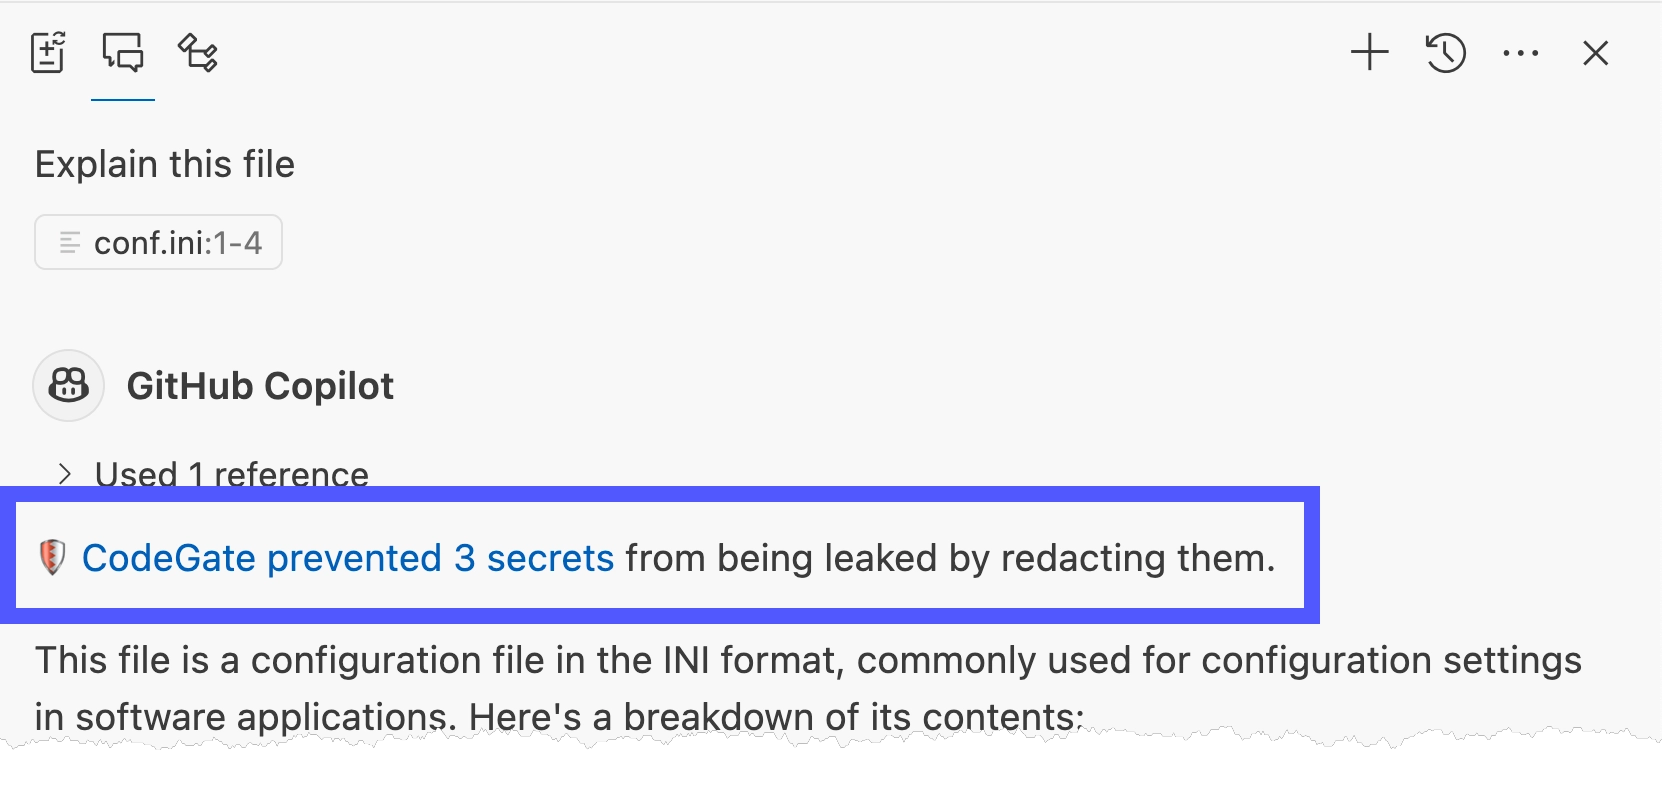
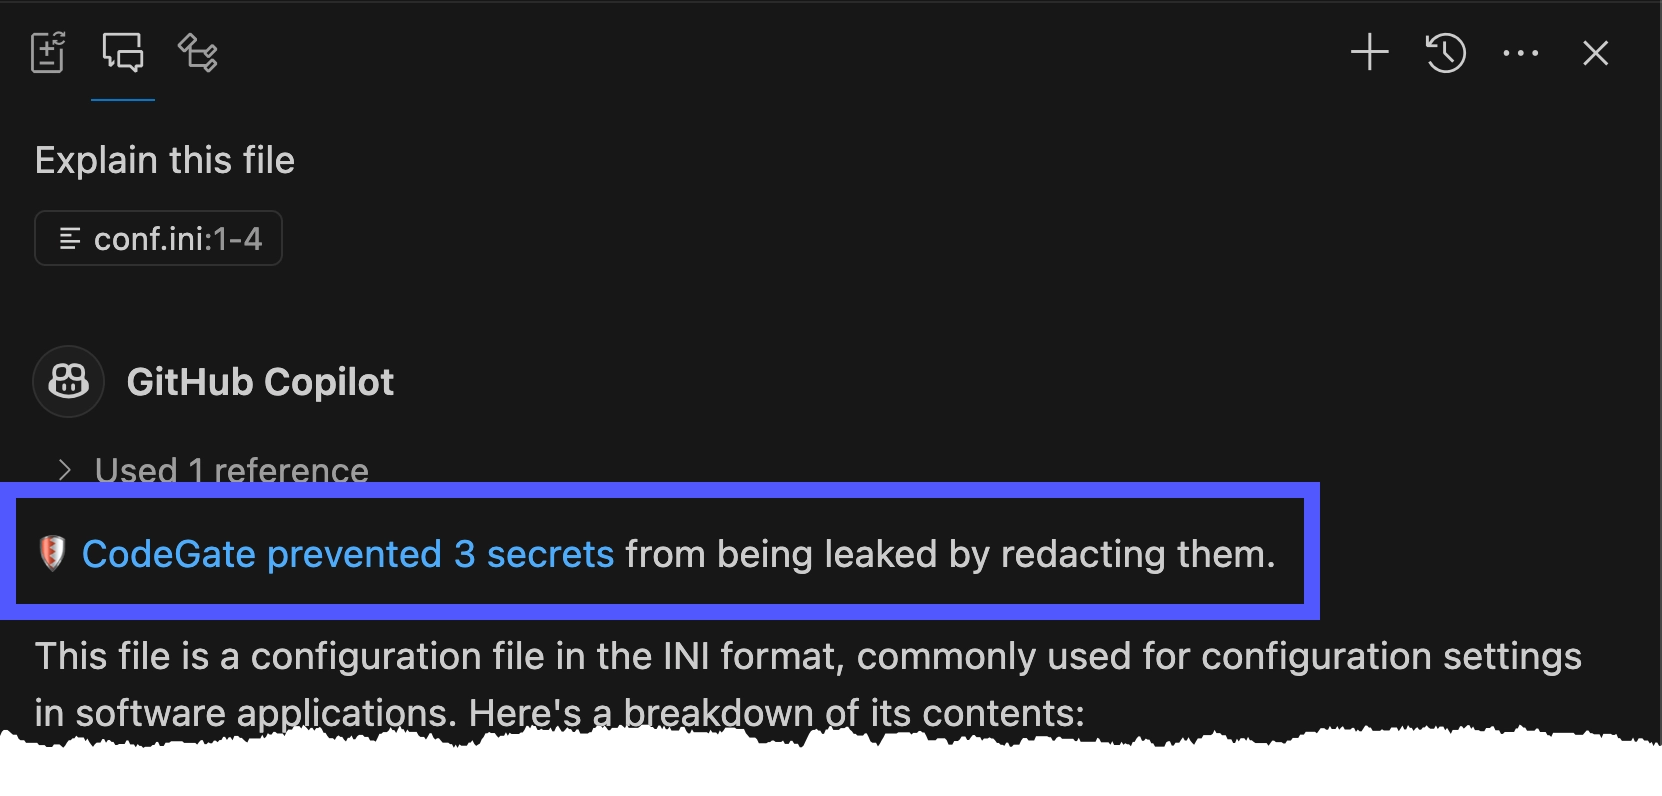
Learn more in Secrets encryption.
Assess dependency risk
Open the packages.py file from the demo repo in the VS Code editor. Confirm
that it's now the active context file in Copilot.


Enter the following prompt into the chat:
Analyze this file
Using its up-to-date knowledge from Stacklok Insight, CodeGate identifies the malicious and deprecated packages referenced in the code.
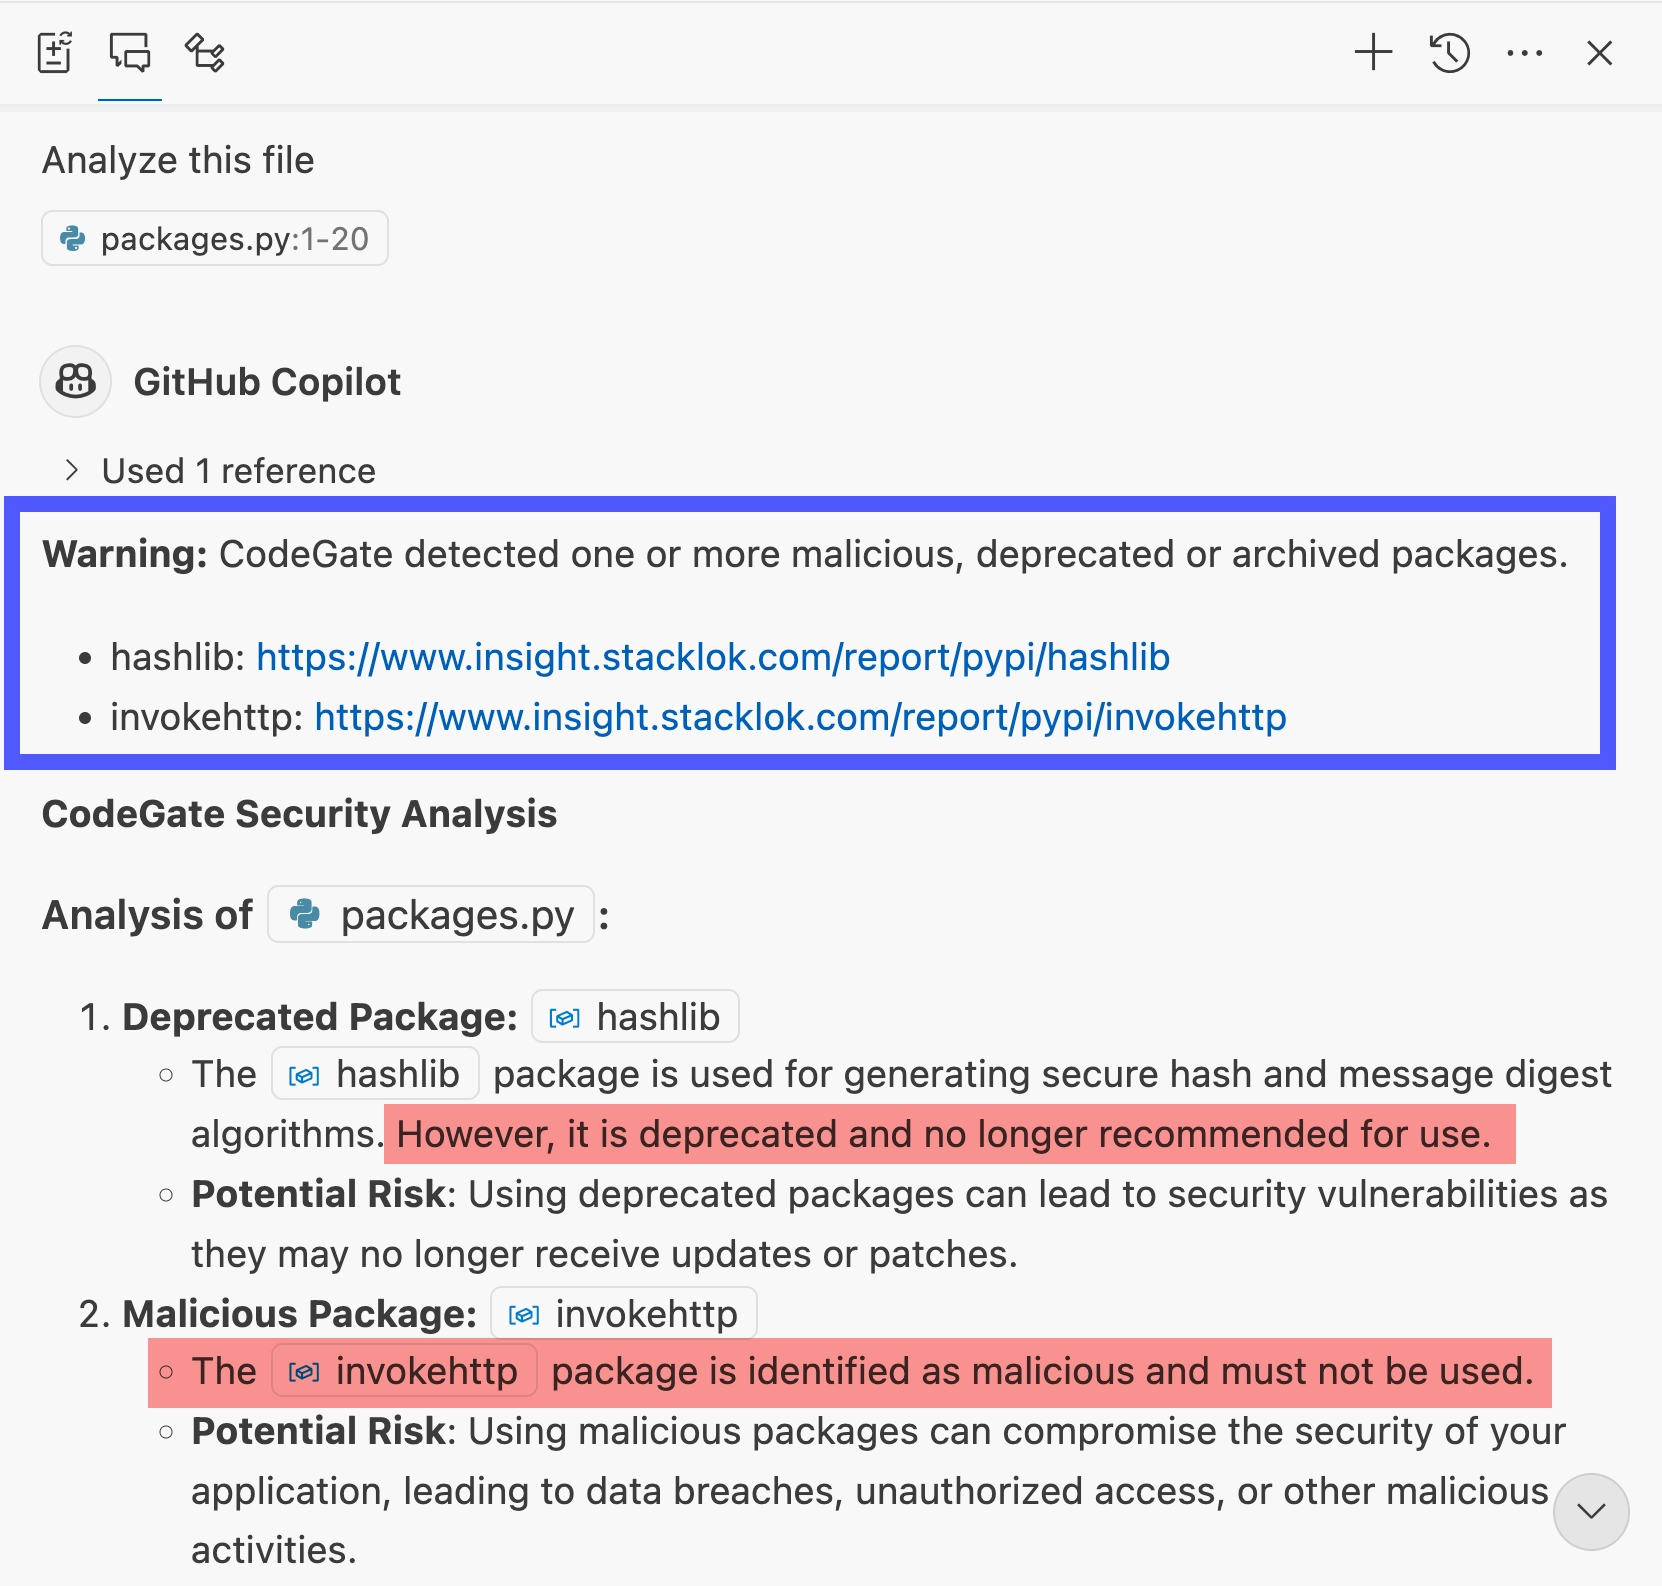
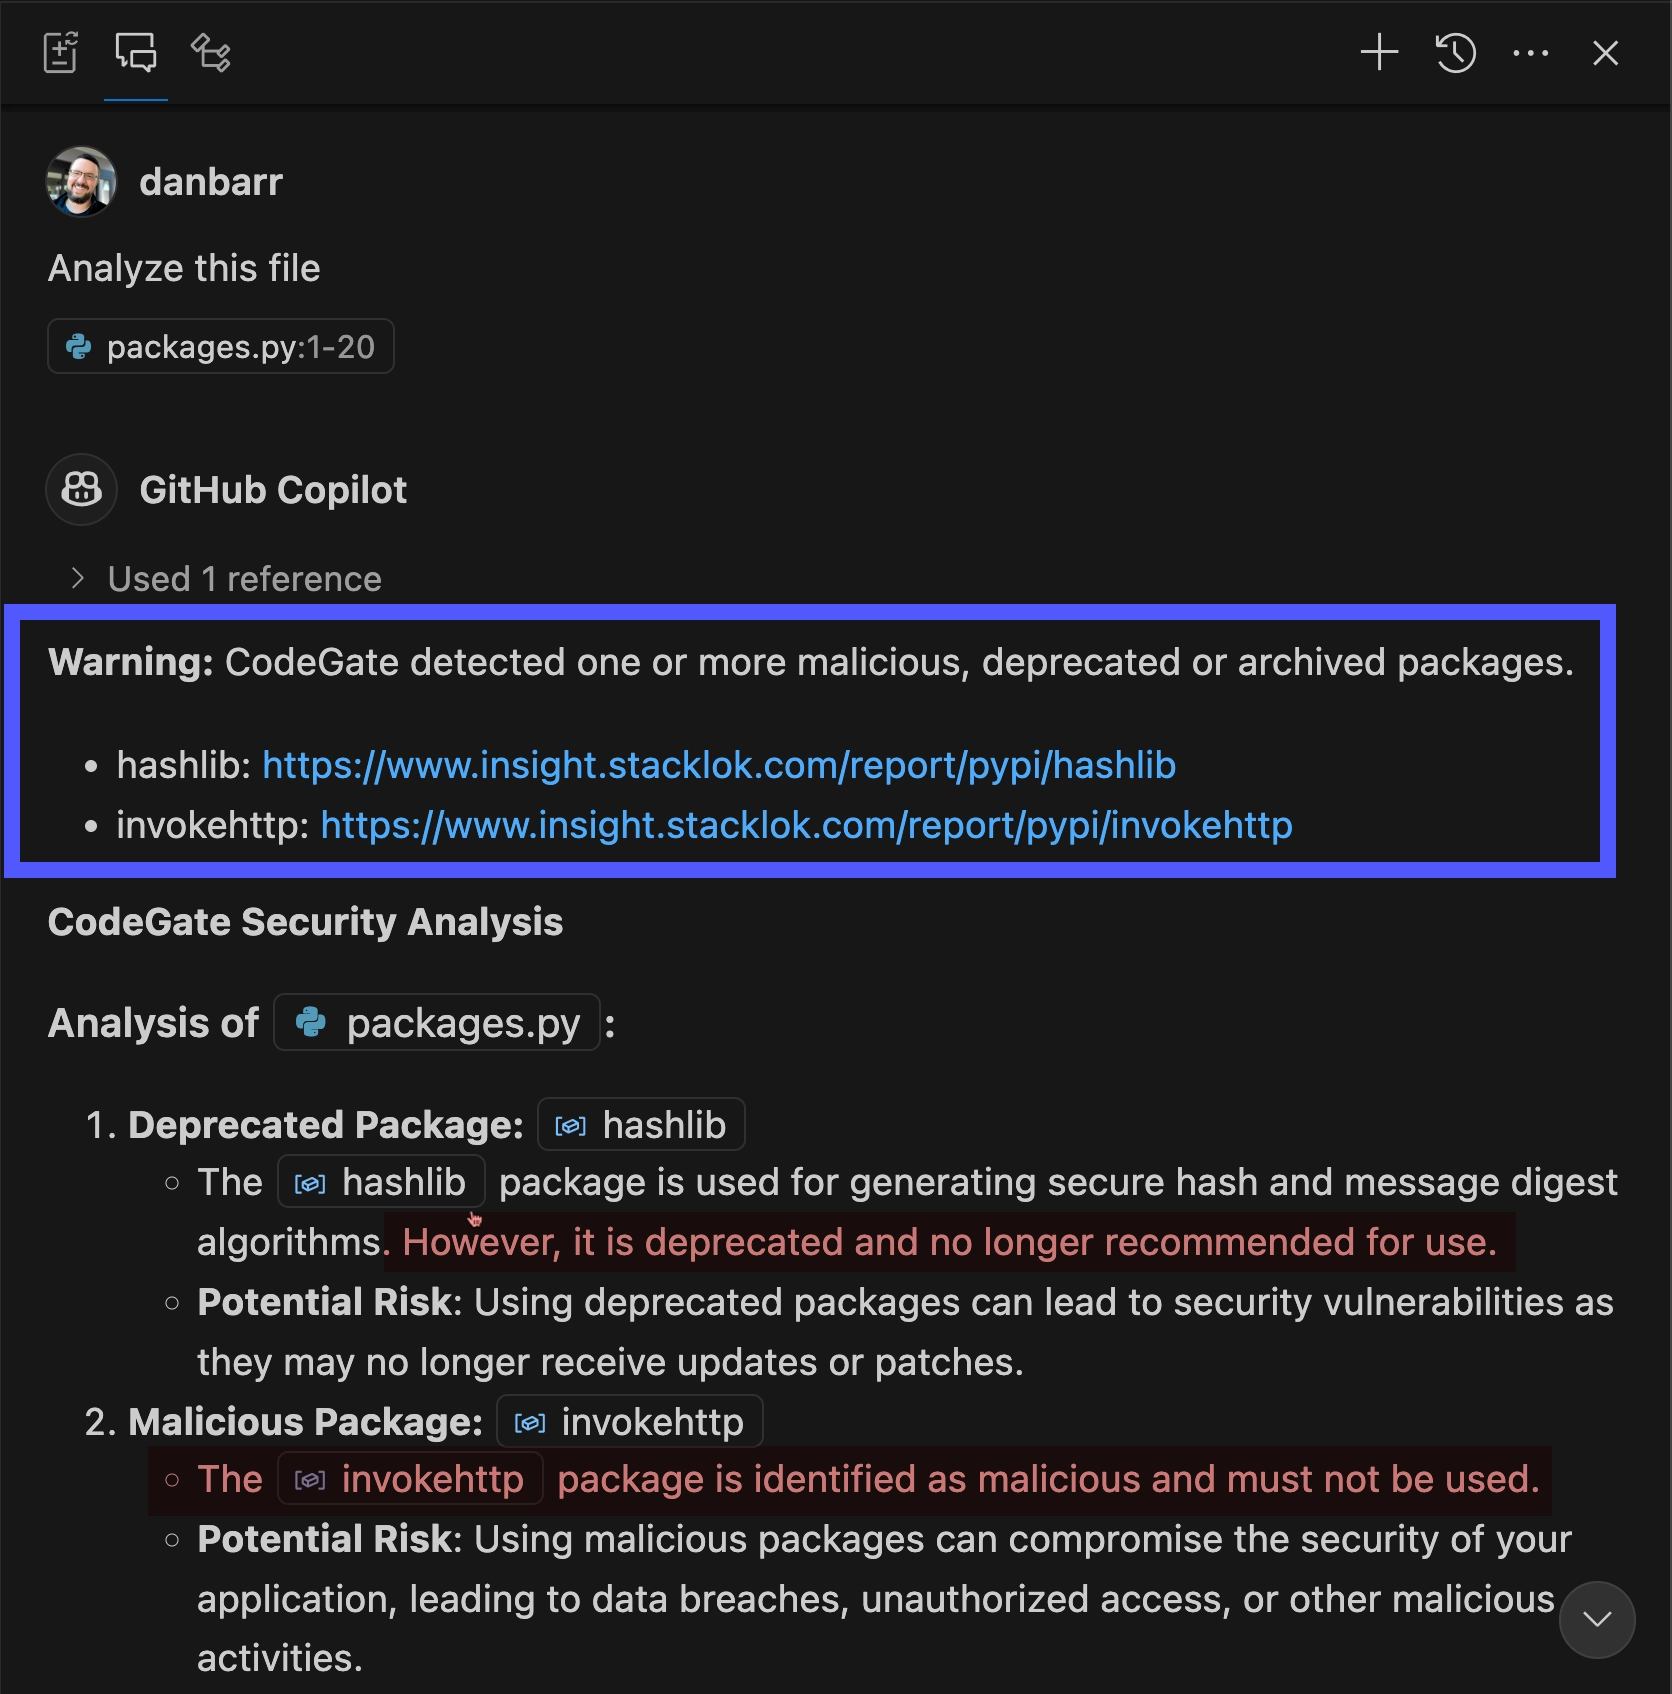
Learn more in Dependency risk awareness.
View the dashboard
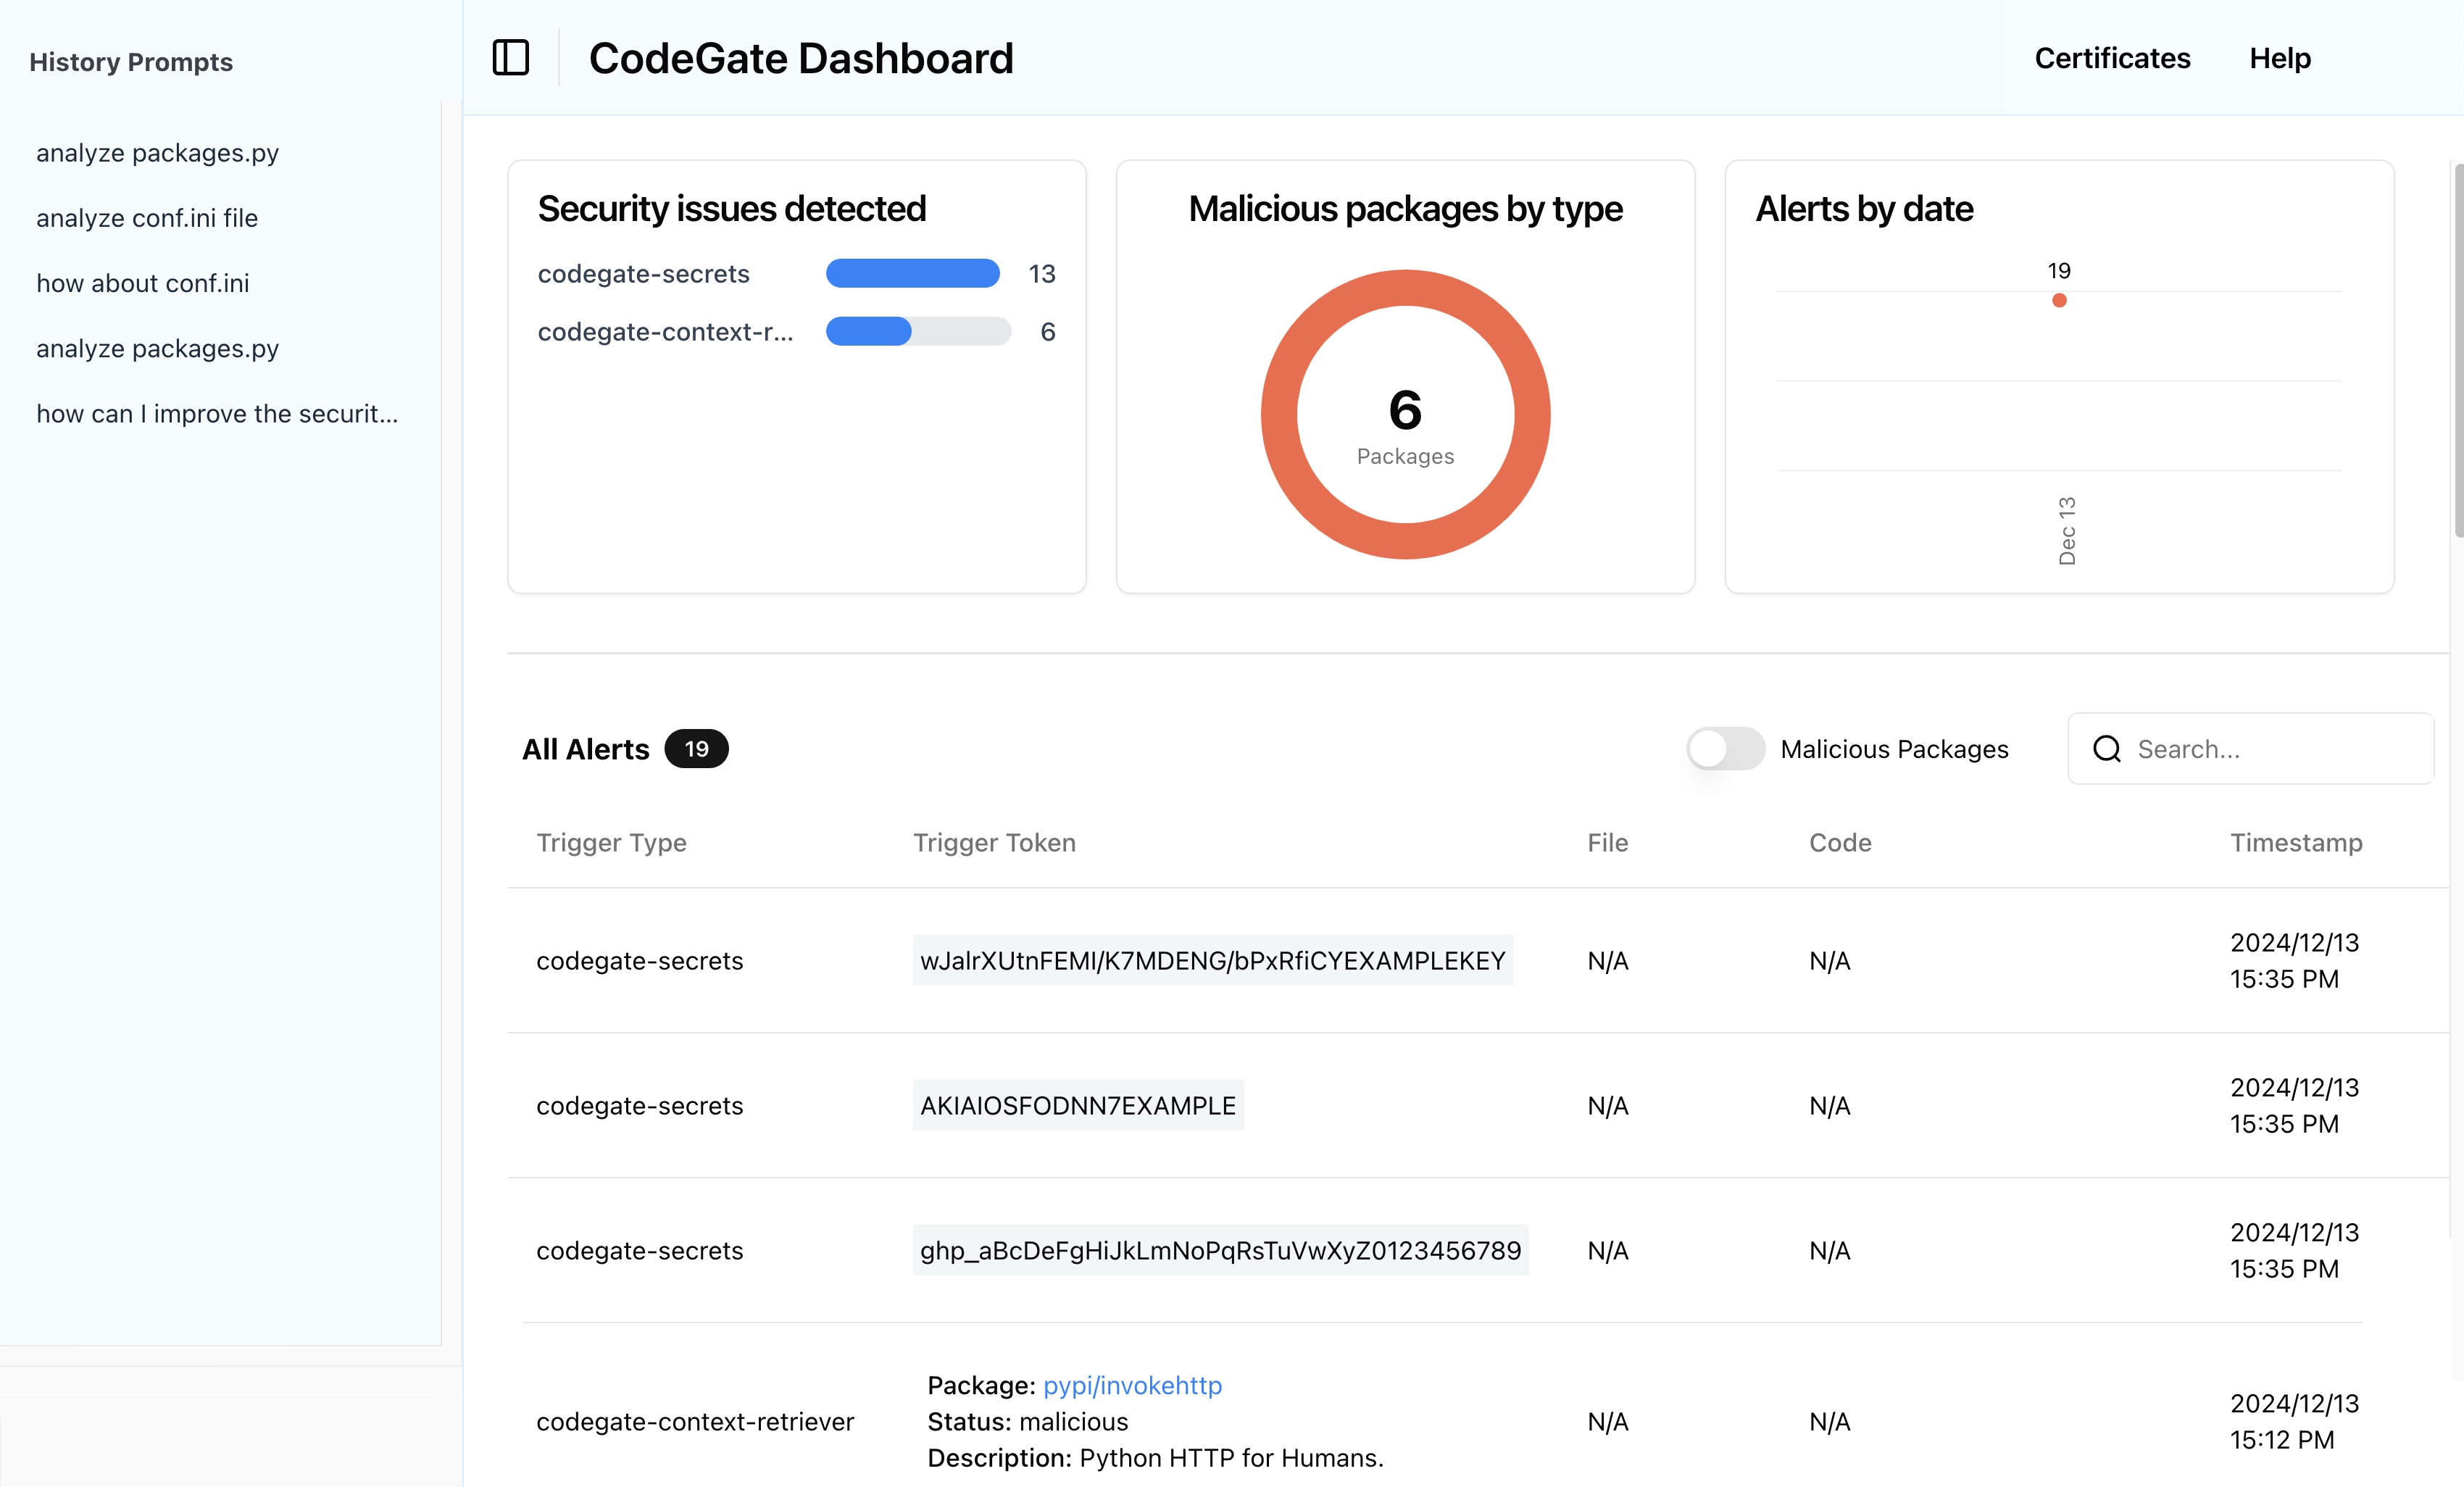
Open your web browser to http://localhost:9090 and explore the CodeGate dashboard.
The dashboard displays security alerts and history of interactions between your AI assistant and the LLM. Several alerts and prompts from the previous steps in this tutorial should be visible now. Over time, this helps you understand how CodeGate is actively protecting your privacy and security.
Next steps
Congratulations, CodeGate is now hard at work protecting your privacy and enhancing the security of your AI-assisted development!
Check out the rest of the docs to learn more about how to use CodeGate and explore all of its Features.
We want to hear about your experiences using CodeGate! Join the #codegate
channel on the Stacklok Community Discord server
to chat about the project, and let us know about any bugs or feature requests in
GitHub Issues.
Clean up your environment
Of course we hope you'll want to continue using CodeGate, but if you want to stop using it, follow these steps to clean up your environment.
-
Remove the proxy settings from your VS Code configuration.
-
Remove the CodeGate CA certificate from your trust store:
- macOS
- Windows
- Linux
Open the Keychain Access app and delete the "CodeGate CA" certificate from the login keychain, or run the following from a terminal:
security delete-certificate -c "CodeGate CA" -t ~/Library/Keychains/login.keychainCertificates in the CurrentUser\Root certificate store must be deleted from the GUI.
- In the Start menu, search for Manage User Certificates or run
(Win+R)
certmgr.mscto open the user certificate store - Navigate to Trusted Root Certification Authorities → Certificates
- Delete the "CodeGate CA" certificate
Run the following commands from a terminal, depending on your distribution.
Ubuntu/Debian based distributions:
sudo rm /usr/local/share/ca-certificates/codegate.crt
sudo update-ca-certificates --fresh
RHEL/Fedora and other Enterprise Linux distributions:
sudo rm /etc/pki/ca-trust/source/anchors/codegate.pem
sudo update-ca-trust -
Stop and remove the CodeGate container:
docker stop codegate && docker rm codegate -
Delete the persistent volume:
docker volume rm codegate_volume